Top Social

Showing posts with label Interactive. Show all posts

Simple Elephant Shaker Valentine

|

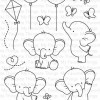
Today I'm featuring this set from from My Favourite Things, I showed in my recent unboxing video. Something about these Adorable Elephants just get me, they are all I want to use this week! This also proves how versatile they can be as my last card was completely different.

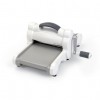
I used my new Hampton Art Stamp Perfect tool and that was awesome! I love being able to stamp in the same spot over again to get perfect images.


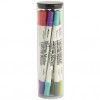
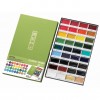
Elephant: N0, N2, N4, E02
Butterflies/Balloons: Y11, Y13, Y15, G00, BG13, BG15, 
V04, V12, V15, RV21, RV04

I prefer to buy my Copics in sets, that way I know the colours coordinate; otherwise I find them overwhelming to buy. So after I stamped all my images I coloured them with the markers listed above. Then I fussy cut my balloons.


I wanted my balloons to wiggle a little bit but stay upright so after sticking them together with a touch of foam tape, I taped some clear acrylic thread to the back. This is available at your local sewing shop. Wrap each end of the thread around the back and tape it, to hold in place. You want them to be a little loose to keep movement.


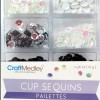
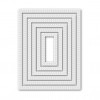
The frame is die cut from WPlus9 Sunshine Layers, another favourite. After two layers of foam tape around the edge, you are ready for your shaker bits and to glue down your background.

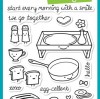
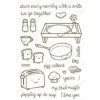
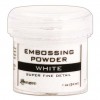
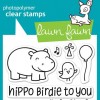
I put the whole shaker piece on a 4 1/4" x 5 1/2" top folding note card. Lastly I pulled my sentiment from the Lawn Fawn Love N' Breakfast set and heat embossed it in Rangers White Embossing Powder on a strip of black.


You could glue your balloons down instead and this would be a super simple shaker card, but I enjoy the movement of them inside. 

Thanks for stopping by and don't forget to share!

Supplies

I list all the supplies I use at the end of my posts for your convenience. The letters below represent where the product can be purchase, ie. AZ – Amazon, SB – Scrapbook.com, SNS- Scrapnstamp. Affiliate links are used when possible at no extra cost to you. Affiliate linking is what keeps my blog running and enables me to work from home with my kids! We appreciate your support!


Magic Slider Birthday Card Tutorial

|


This style of card is completely new to me! I think I've seen 2 now and I really wanted to try my hand at it! Boy, was it a lot of fun to figure out and create.

I started out by choosing my stamp set first,  Lawn Fawn's Year Four stamp set. I also knew I wanted it to be for a male. 


Cut your white cardstock to 8" x 5 1/4" and score in half. Then I decided how big I wanted my window to be and chose a die to cut it. My favourite rectangle dies are from Simon Says Stamp. I love that the stitching are on the inside and outside of the cut line. 


After cutting it I lightly traced the opening onto the inside so I knew the exact area I was working with. Then I used black ink to stamp my seen on the inside FIRST! This is very important to getting images that line up in the end. Go ahead and stamp out your scene now. 


Next I made my track elements. This is very simple, using strips of paper, glue them a little outside your pencil lines. 

Then use a ruler to cut along the fold 4" using an exact knife (This should make the slit slightly longer than your pencil lines as well so the slider covers the entire image). They no longer make the one I have but I linked to one very similar, it has a soft ergonomic design and is very comfortable to use. I also recommend a self healing cutting mat. 

Now cut your slider element at 4" x 4 1/2". You may even want to cut it slightly under the 4" mark to make sure it slides smoothly. You attached another strip that is slightly larger to the left inside edge (on the bottom so it doesn't show when sliding), this keeps it from sliding right out or wobbling back and forth. Do not glue down the front until everything is complete so you can do your outside stamping and colouring of your image. Hopefully by looking at the picture above, this all made sense?!


Glue down your acetate to the inside of the window. Remove the slider element and close the card so you can now see the stamped image on the inside through the acetate. Now make sure to use StayzON Jet black. This ink will dry quickly and not smudge on the acetate. Carefully line your images over top and stamp them again. 

I'll be honest, I didn't love the images at this point, they weren't solid and crisp enough for me. My solution was to take my 05 Micron Pen and go over top of the images and now they look much nicer.

Now back on the inside you need to colour your images. Using my Distress Markers I chose the brightest colours for my balloons; some pinks for my birdie and blues for my hippo. After that I did my background (in hind sight I should have done this first!) I watercolored it quickly with some blue. This made my images fuzzy, so I went back in with the same pen to darken these images as well.


Distress Inks are perfect for making a rainbow, they blend together nicely. So I quickly scribbled a rainbow and used a scalloped edge to die cut it. This was glued on top of my slider on the right side where it hangs out. After hole punching it, I added black twine to tie in the black stamping.


Now you are ready to assemble everything together. Place your slider element inside and place glue only along the top of your track pieces. Fold your card over and admire your handy work!

Almost done now, I swear. I took those same Distress makers again and coloured directly onto my sentiment stamp, to give a gradient rainbow effect. Cut this into a little banner and pop it up with some foam tape.


Lastly, I glued the whole panel onto some blue glitter cardstock and that all went onto my A2 size card base. 


This was so much fun to make, I challenge you to give it a try!

Thanks for stopping by and don't forget to share!

Linking this post to MFT Sketch Challenge 314 and SSSWChallenge.

Supplies

I list all the supplies I use at the end of my posts for your convenience. The letters below represent where the product can be purchase, ie. AZ – Amazon, SB – Scrapbook.com, etc. Affiliate links are used when possible at no extra cost to you. Affiliate linking is what keeps my blog running and enables me to work from home with my kids! We appreciate your support! 

Custom Post Signature

Custom Post  Signature